
Every homeowner eventually faces the same challenge: the systems that keep a house running smoothly age faster than the design elements that make it feel like home. Updating plumbing, climate control, and outdoor infrastructure often feels like it might clash with the character you have worked hard to create. The good news is that modernization and design preservation are not mutually exclusive goals. With the right planning and the right professionals, you can upgrade performance and efficiency while keeping the architectural soul of your home intact.
This guide walks through the key areas to consider so you can make confident, informed decisions.
Starting With a Clear Vision Before Any Work Begins
Before demolition or installation begins, it helps to document what you love about your home’s current character so nothing gets lost in translation during upgrades. Photograph trim details, note ceiling heights, and identify the materials that give each room its personality. Pay attention to elements like crown molding profiles, original hardware, window casings, and the way natural light moves through a space at different times of day. Even small details, such as the width of baseboards or the pattern of a herringbone floor, contribute to a home’s overall feel and deserve a place in your records.
This documentation doesn’t need to be elaborate. A simple folder with dated photos, a few measurements, and notes about which features are non-negotiable versus flexible can save significant time and money later. Some homeowners also create a simple spreadsheet ranking priorities, distinguishing must-keep architectural features from areas open to reinterpretation.
This record becomes a reference point for every contractor who touches the project moving forward. When electricians, plumbers, and HVAC technicians can see exactly what needs to be preserved or worked around, miscommunication drops significantly and rework becomes far less likely. Many homeowners find that involving a home builder early in the planning process helps bridge the gap between aesthetic goals and structural realities, since an experienced professional can flag conflicts—like a load-bearing wall that complicates an open-concept dream—before they become costly surprises mid-renovation.
A home builder with experience in renovations rather than only new construction can spot potential conflicts between old-house charm and modern code requirements. For example, updating an electrical panel from 100 amps to 200 amps to support new HVAC equipment may require rerouting lines through plaster walls or original millwork you intended to preserve. A builder who has handled similar projects will flag these tension points before demolition begins, not during it.
They can also advise on sequencing, since some system upgrades need to happen before cosmetic work starts. Plumbing rough-ins, duct rerouting, and panel upgrades typically need to happen before drywall, flooring, or cabinetry installation, so a misordered timeline can mean tearing out finished work to access a pipe or wire. A good rule of thumb: anything hidden behind a wall or under a floor gets addressed first, and anything visible gets addressed last.
If your plans include expanding square footage, a home addition contractor should be brought in during the earliest design conversations, not after floor plans are finalized. They can weigh in on whether existing electrical service, ductwork, or water lines can support the new space or whether upsizing is needed, and they can flag foundation or roofline issues that affect how the addition ties into the original structure. Waiting until permitting or framing to loop them in often forces costly redesigns.
Coordinating these professionals from day one, including regular joint walkthroughs and a shared project timeline, prevents costly rework later. Even a single hour-long meeting between the home builder, home addition contractor, and any specialty trades before finalizing plans can surface conflicts that would otherwise cost thousands to fix mid-project.
Upgrading Water Systems Without Losing Character

Plumbing is one of the least visible, but most impactful systems in any home, and outdated pipes can undermine even the most beautifully designed kitchen or bathroom. Older galvanized or lead pipes are prone to corrosion, reduced pressure, and water quality issues that no amount of design polish can hide. Hiring reliable plumbing services to assess your current setup is a smart first step, especially in homes built before the 1980s. A thorough inspection can reveal whether a full repipe is necessary or whether targeted repairs will suffice.
Beyond the pipes themselves, water quality is worth addressing during any renovation. Installing water filtration systems at the point of entry or under specific sinks can dramatically improve taste, safety, and the lifespan of appliances that rely on clean water. Hard water in particular can cause mineral buildup in fixtures, water heaters, and even coffee makers over time.
- Have your water tested before choosing a filtration option
- Consider whole-house systems for homes with heavy mineral content
- Ask about maintenance schedules for filter replacement
- Choose fixtures that match your home’s existing hardware finishes
Modernizing Climate Control for Comfort and Efficiency
Heating and cooling systems have advanced significantly, and older units often struggle to keep up with modern efficiency expectations. This is especially true in larger homes or properties that have been expanded over the years without corresponding updates to the mechanical systems. In some cases, industrial HVAC systems designed for commercial durability are being adapted for high-square-footage residential properties that need consistent, powerful climate control. These systems can handle zoning requirements across multiple additions or wings of a home.
When upgrading, ductwork placement matters just as much as equipment selection if you want to preserve original architectural details. Skilled installers can route ductwork through closets, soffits, or unused wall cavities to avoid disrupting crown molding, exposed beams, or original ceiling heights. Ask for a walkthrough of proposed duct paths before work begins so you can flag any areas of concern.
- Request a load calculation before selecting new equipment size
- Ask about zoning options for homes with additions
- Discuss noise levels for units placed near living spaces
- Confirm warranty terms tied to professional installation
Designing Outdoor Living Spaces That Complement Your Home

Outdoor spaces have become an extension of the home’s living area, and many homeowners are investing in features that were once considered luxury add-ons. A custom pool installer can design a pool shape, decking material, and surrounding landscape that echoes the architectural lines of the house rather than looking like an afterthought. This attention to detail matters most in homes with strong stylistic identities, such as mid-century modern or traditional colonial designs. Matching materials, colors, and proportions helps the new addition feel like it was always part of the plan.
Beyond aesthetics, functional considerations like drainage, sun exposure, and proximity to mechanical equipment should factor into pool placement. A well-planned layout also considers how the pool area connects to indoor living spaces through sightlines and traffic flow. Taking time during the design phase to walk the property at different times of day can reveal issues that are hard to spot on paper.
- Match decking materials to existing exterior finishes
- Plan for equipment placement away from main sightlines
- Consider future maintenance access when finalizing layout
Defining Property Boundaries With Purpose
Fencing serves both practical and design purposes, marking property lines while contributing to the overall look of a home’s exterior. Working with experienced fence builders ensures that materials, height, and style align with neighborhood guidelines as well as personal preference. Wood, vinyl, wrought iron, and composite materials each offer different maintenance requirements and visual weight, so it is worth discussing long-term upkeep before committing to one option.
Fencing decisions also intersect with privacy needs, pet containment, and even safety around pools or play areas. A well-designed fence can frame a garden or outdoor living area rather than simply enclosing it, adding to the overall sense of intentional design. Getting a professional opinion on post spacing and gate placement can prevent structural issues down the road.
- Check local regulations on fence height and setback requirements
- Choose materials that complement your home’s existing color palette
- Factor in gate placement for daily foot traffic patterns
Improving Driveways and Walkways for Function and Curb Appeal
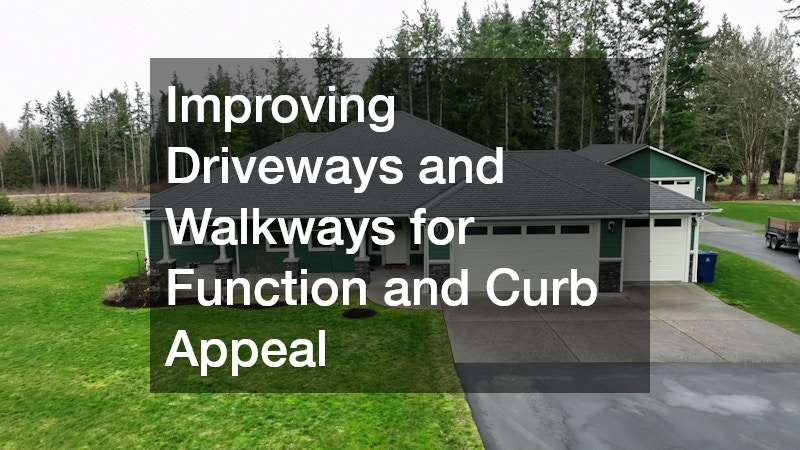
The path leading to your front door sets the tone for a visitor’s first impression, and cracked or uneven surfaces can undercut even the most thoughtfully renovated exterior. Quality asphalt paving offers a durable, cost-effective solution for driveways that need to withstand heavy vehicle traffic and seasonal weather changes. Proper base preparation and drainage planning are essential to prevent premature cracking or pooling water.
Beyond the driveway itself, walkways and entry paths deserve equal attention during a modernization project. Consistent materials between the driveway and walkway create visual cohesion, while contrasting borders can highlight architectural entry points. Regular sealing and maintenance extend the life of paved surfaces significantly.
- Schedule resealing every two to three years for longevity
- Ensure proper slope for water drainage away from the foundation
- Match edging materials to existing landscaping features
Maintaining Healthy Trees and Landscaping During Renovations
Mature trees often define a property’s character, and protecting them during construction requires careful planning. Heavy equipment, trenching for utilities, and grading changes can all damage root systems if not managed properly. Consulting tree services before major construction begins allows professionals to assess root zones and recommend protective barriers or pruning to reduce stress on the tree.
Healthy trees also contribute to energy efficiency by providing natural shade in summer and windbreaks in winter, which supports the performance of newly upgraded HVAC systems. Regular trimming and health assessments help prevent storm damage that could otherwise threaten nearby structures. Keeping trees healthy during a renovation protects both the investment in landscaping and the surrounding home.
- Install temporary fencing around root zones during construction
- Avoid changing soil grade near mature tree trunks
- Schedule pruning during dormant seasons when possible
Protecting Your Renovation Investment From Pests
New additions, updated plumbing, and fresh landscaping can all inadvertently create new entry points or attractive conditions for unwanted pests. Scheduling an inspection with local pest control providers before and after major construction helps catch issues early, particularly around foundation gaps or new utility lines. Termites, rodents, and insects are drawn to disturbed soil and stored construction materials, making vigilance especially important during active projects.
Preventive treatments applied during construction are often more effective and less invasive than addressing an infestation after the fact. Sealing entry points around new plumbing penetrations or HVAC ductwork can significantly reduce future pest problems. Building a relationship with a pest control provider who understands your home’s specific layout pays off over the life of the property.
- Ask about pre-construction treatments for foundation and soil areas
- Request follow-up inspections after major system installations
- Address moisture issues promptly since they attract pests
Sequencing the Project for Minimal Disruption

One of the most overlooked aspects of a whole-home modernization is the order in which work happens. Structural changes, system upgrades, and finishing touches all need to happen in a logical sequence to avoid redoing completed work. Homeowners who plan the timeline in advance typically experience fewer surprises and lower overall costs.
A typical sequence starts with structural or layout changes, moves to rough-in work for electrical, plumbing, and HVAC, then proceeds to insulation and drywall before finishes like flooring, cabinetry, and paint. Skipping ahead—installing custom millwork before electricians finish running new wiring, for example—often means tearing out finished work to fix what’s underneath.
Smart sequencing also accounts for inspection points and material lead times, since a delayed cabinet order or a failed rough-in inspection can stall every trade scheduled after it. Building a few days of buffer between phases, and confirming each trade’s dependencies before signing off on the schedule, helps keep the project moving without costly rework.
It also helps to build in buffer time between phases, since inspections, permit approvals, and material lead times can shift schedules unexpectedly. A good rule of thumb is to add 10-15% padding to each phase’s estimated duration, and even more for custom items like cabinetry or specialty windows that may take 8-12 weeks to arrive. Electrical and plumbing inspections alone can add several days to a week if a municipality is backed up, so it pays to check your local permitting office’s average turnaround before locking in a schedule.
Communicating clearly with every contractor about dependencies keeps the project moving smoothly. For example, the drywall crew shouldn’t be scheduled until electrical and plumbing rough-ins have passed inspection, and flooring installers need confirmation that HVAC ductwork won’t require them to pull anything back up. A quick weekly check-in call or site walkthrough with the general contractor can catch these conflicts before they become costly delays.
A written timeline shared among all parties reduces confusion and miscommunication. Tools like shared spreadsheets, project management apps, or even a simple printed schedule posted at the job site give everyone a common reference point. Updating this document whenever a delay occurs, and noting the reason, also helps you spot patterns and plan more accurately if future phases of the renovation hit similar snags.
- Complete structural and system work — electrical, plumbing, HVAC, framing — before any cosmetic finishes go in, since ripping out fresh drywall or flooring to fix a wiring issue wastes both money and morale
- Sequence trades logically: rough-ins first, then insulation and drywall, then flooring, cabinetry, and paint last to avoid damaging finished surfaces
- Build buffer time into the schedule for inspections and permits — add 1-2 weeks per inspection milestone, since municipal delays are one of the most common causes of project overruns
- Identify which permits require sign-off before covering walls (electrical, plumbing) so inspectors aren’t scheduled around finished work
- Share a master timeline with every contractor involved, including subcontractors, and update it weekly so schedule shifts don’t cause missed handoffs
- Hold a brief weekly check-in with lead trades to catch conflicts early, especially when multiple crews need access to the same space
Modernizing your home’s systems does not have to mean sacrificing the design vision that drew you to the property in the first place. By approaching plumbing, climate control, outdoor features, and landscaping with the same care given to visual design, you create a home that performs as beautifully as it looks. Start by documenting your priorities, then bring in qualified professionals early enough to align function with form. Taking a thoughtful, sequenced approach today will protect both your investment and your home’s character for years to come.
